Find us on Google+ Astronomy Box: 2012

23 December 2012

DSO 6 - M42 Orion Nebula

Between the seemingly unending supply of cloud cover I've managed to finally produce another attempt on the Orion Nebula M42.


OTA: WO 72mm Megrez w/ Moonlite Focuser & SkyWatcher FF & LPR Filter
Guiding: TS 9mm OAG w/ Orion starshoot
Mount: HEQ5 Pro w/ EQMOD
Camera: Nikon D3100 14.2mp
ISO: 1600
Lights: 3x60sec
Darks: 15x60sec
Flats: None
Bias: None
Processing: Nebulosity
Post-processing: Photoshop


9 December 2012

Goodbye, Sir Patrick Moore

You are the Attenborough of Astronomy and an inspiration to amateur and professional astronomers everywhere. Not to mention, Games Master!

You will be dearly missed by us all.

26 November 2012

To Planisphere or to App-isphere? - Astronomy apps

One of the most recommended pieces of equipment to buy when starting out in astronomy is the humble Planisphere.

Planisphere Wikipedia
Although these are very quick and easy to use, not to mention cheap, a lot of us now own smartphones. Off course, smartphones aren't cheap in any context but they are never the less part of our lives now and the chances that a new amateur astronomer owns one are high. With this in mind, I decided to list off some of my favourite apps that I like to use when doing astronomy. I must mention that this list will be totally biased towards Android, although I know that amazing apps do also exist for iOS.


1. Weather apps

A good place to start is weather forecasting apps. Without clear skies there is no astronomy, at least in the optical sense, and to know what the weather is doing a few days in advance in invaluable for planning your observing or imaging sessions. To say that I have trialled a few weather apps, would be an understatement. I've gone through AccuWeather, Weatherbug, you name it, but the only one that really stood out from the crowd is a fantastic little app called Astro Panel by Shibby Developments. I have already covered the features of this app in a previous article, but it has a solid position in my list and deserves another mention

Screenshot of Astro Panel on my phone. This was during my visit to the Mt Teide Observatory, Tenerife.

2. Planetarium apps

Being an Android user there are really only two choices to consider when looking for a decent planetarium software, Google Sky Map Devs Sky Map and Harshad RJs SkEye. While Sky Map is a perfectly good planetarium app with lots of great features and searchable objects, not to mention being the first one I used, I'm going to show preference to SkEye. The main reason for this is that I encountered a lot of glitches in Sky Map when searching for objects in real time, and the planetarium would be misaligned from the true sky. I don't know if it was an issue with my phone or the current OS at the time, but it made me search for something better. Something better came in the form of SkEye.

Screenshot of SkEye, looking at the constellation Orion.
As you can see from the screenshot, there is a wealth of information on-screen when trawling through the sky, much more in fact  than Sky Map has to offer. The simple displaying of right ascension, declination and other coordinates shows that this app is made for the serious amateur. Another great feature is that magnitudes for celestial objects are also provided.

Don't get me wrong, Sky Map is a great app. However. if you are an Android using amateur astronomer and want an app that is useful beyond simply locating objects in the sky, SkEye is the one for you. I cannot vouch for any of the planetarium apps on iOS platforms but I have been told that they run very smoothly and are very reliable. As to features, you'll need to talk to an Apple fan.


3. Compass apps

 The next couple of apps I'm going to discuss, I use mainly for mount set up. Compass apps are very useful, and come in all shapes and sizes. However, the compass I chose is actually part of a package app containing a number of different navigation and positioning apps. Ulysse Gizmos by binarytoys has an array of interfaces, including a very detailed compass.

Screenshot of Ulysse Gizmos on the compass interface.
As well as finding your bearings, it also measures your altitude which is important for many GOTO systems that may not have GPS included, and require the manual entering of these coordinates. Another feature shown in the screenshot hints at my next chosen app for use in astronomy and the reason why I chose Ulysse Gizmos.


4. Spirit Level apps

Getting your mount level and polar aligned is in most cases essential, especially when using GOTO systems and doing high focal length astrophotography. Whereas some do, many mounts don't come with built in spirit levels. The solution I came up with was using a spirit level app on my Android phone and placing the phone onto the accessory tray of my HEQ5 Pro while levelling it. The Ulysse Gizmos spirit level works great. Since doing this my mount alignment has been very satisfactory, enabling unguided subs of 1min and being perfectly adequate for 5min+ guided exposures.

If for some reason, like me, you'd like to have a simpler dedicated spirit level app on your phone, I would recommend Bubble Level by Antoine Vianey.

Screenshot of Bubble Level
With this super simple interface and high resolution spirit level, aligning and levelling your mount is easy as pie.


I hope this list might make some ones observing or imaging life a little easier, and I might add to it in the future. Also, watch out for another future article on a very handy little modification I made to my smartphone that I use every single night I go out to observe or do some astrophotography.

For now, clear skies.

21 November 2012

Off Axis Guiders and Light Pollution Filters

Most of the time, I live in a moderately light polluted area. Like a lot of us, I use a standard light pollution filter to counteract the effects of sodium light and other artificial light when I'm doing my astro-imaging. Recently a new friend of mine explained to me that although they do a pretty good job of dealing with light pollution, they also filter out some of the light from stars and other astronomical sources, particularly in the red spectrum. After comparing some of my own astro-images with those of other astrophotographers, this became apparent, and I noticed that some of the stars in my images that should have been redder had been desaturated.

Obviously, no filter can ever replace a proper dark sky, but my friend very kindly pointed me to a certain type of specialised light pollution filter called a IDAS LPS filter. This filter, produced by Hutech, has much better colour correction. It lets all the important light through, while filtering out that unwanted light pollution, and without introducing that characteristic blue/violet tinge associated with cheap LPR filters.

Researching the IDAS LPS I noticed that many Nikon users were having trouble finding CLS versions of this filter, which clip into your DSLR before it gets attached to your imaging train. The benefits of this is that you can have your filter behind your off axis guider instead of in front. With a filter in front of your OAG it could darken already faint but usable guide stars. Now, I did find a Nikon CLS version of this filter. Only thing was, it was quite expensive and quite a bit more than the regular 2" filter. 

I took a look at my Nikon T-ring and noticed that it actually had a groove in it which would accommodate 2" filter glass. Thus, the solution presented itself.

Nikon T-ring and standard 2" LPR filter
I simply removed my LPR filter from its cell and inserted it into the T-ring. This is something I haven't seen done anywhere and thought perhaps people weren't aware of it, that being the reason for this article.

The 2" LPR filter glass inserted into the Nikon T-ring
The procedure was quite straight forward, needing only a small hex key and a small minus screw driver to unscrew the filter cell. 


In doing this I have come up with two solutions. I can now use my standard LPR filter behind my off axis guider, and when I'm ready to purchase the IDAS LPS, I can go for the cheaper 2" version and do the same modification.

So, thanks to Pawel for putting me on this train of thought.

13 November 2012

DSO 5 - M45 Pleiades Cluster (Colour)

A slight improvement in processing, and now in glorious Technicolor.

I managed to retain the colour information from the Nikon RAW NEF files by simply saving the images as TIFFs in Photoshop before processing them in Nebulosity.


OTA: WO 72mm Megrez w/ Moonlite Focuser & SkyWatcher FF & LPR Filter
Mount: HEQ5 Pro
Camera: Nikon D3100 14.2mp
ISO: 1600
Lights: 15x60sec
Darks: 15x60sec
Flats: None
Bias: None
Processing: Nebulosity
Post-processing: Photoshop

8 November 2012

DSO 4 - M45 Pleiades Cluster

We got a nice clear night recently and I managed to get some pretty satisfactory
data of M45 to go with my new copy of Nebulosity.

I'm having a few initial niggles with processing the raw data from my Nikon D3100, but I'm quite pleased with what came out the other end.


OTA: WO 72mm Megrez w/ Moonlite Focuser & SkyWatcher FF & LPR Filter
Mount: HEQ5 Pro
Camera: Nikon D3100 14.2mp
ISO: 1600
Lights: 15x60sec
Darks: 15x60sec
Flats: None
Bias: None

Basically, my stacked results of M45 are coming out pretty much monochrome although the blue nebulosity is clearly visible in the raw images. I'm obviously doing something wrong in one of the steps. I'm following Craig Starks tutorials on the Stark website. Hopefully I'll be able to iron out these issues soon, and show the seven sisters in all their reflective nebulosity.

Also, part two of my Tenerife trip to come shortly. 
Apologies for the delay.

22 October 2012

A Week In Tenerife - The Mt Tiede Observatory Part 1

I don't have any aspirations to be a travel writer, but I think I have found the exception.

A few weeks ago I had the great pleasure of accompanying a group of physics students from UCC on a trip to the Observatorio del Teide, an IAC run observatory perched high up on Mt Teide, Tenerife. There were eight of us in our party. Five students, Dr. Paul Callanan, Stephen Bean (The university film maker) and myself. My role over the seven days was mainly as the filming assistant and sound technician, that is to say; holding the microphone in the interviewees faces. I also had my own, nocturnal agenda.

We would set out from Dublin airport. The flight which was just over four hours, took us to the Canaries and the island of Tenerife. On approach, noticing the gigantic conical volcano of Mt Teide is unavoidable. It rises high out of the clouds where the inversion zone prevents low hanging cloud from rising up the slopes. It is truly breathtaking.

This photo, for me really encapsulates the majestic beauty of the island of Tenerife. You can just see the observatory to the left of Mt Teide. If I could choose one place in the world as my office, this would be it.

Accommodation for the film crew (Myself and my father) consisted of B&B style lodgings in a little village called Arafo, which is situated about 4km inland and about 500m up the side of the island. Although this meant a forty minute drive up and down from the observatory every day, it gave us some great opportunities to film some scenic shots and cut-aways. I will forever associate popping ears and the smell of roasted break pads with Tenerife. The science team meanwhile, stayed in the accommodation provided by the observatory itself. This consists of La Residencia and some communal dorms, both of which are available at varying, but not wholly unreasonable rates.


The observatory itself is amazing. With over twenty telescopes, the landscape is dotted with the familiar white domes, and some with very unusual enclosures. When visiting the observatory during the day, we could watch the various solar telescopes tracking the sun throughout, from morning until the evening. In fact the most unusual structure I had seen belonged to one of these solar scopes. The 70cm VTT or Vacuum Tower Telescope.

The enormous structure, housing the VTT solar telescope
While the astronomers sleep during the day, those with scheduled telescope time during the night would actually rise a number of hours before sundown in order to make sure the telescope is running smoothly and to take calibration images. This was no different for our group of physics students. The evenings, or morning for them, would generally consist of calibration, dinner and then back to the telescope to get ready for the nights observing. The telescope we had booked observing time on, was the IAC80.

The open dome of the IAC80
The IAC80 is an 82cm cassagrain type telescope and sits on a quite unusual German equatorial mount. Unusual, because the scope itself is held by a fork and the fork is situated where the polar scope would be on a more familiar amateur German equatorial mount. Construction of this particular telescope began in 1980, and was finally completed in 1991. A fun bit of trivia; because it took so long to complete, it was given the symbol of a snail.

The IAC80s snail symbol on the door of the dome building.
Although the whole trip was scientifically a success, the observing nights were not without glitches. The IAC80 proved to be a little temperamental during our visit and we encountered a few minor issues, such as a dome that refused to rotate, refused to stop rotating, some software issues and one night, some high altitude cloud rolled in to cut the end of the night short. Obviously they weren't able to control the weather, but our fantastic telescope operators were ever at hand to help out and get the observing back on track.

An amazing bit of mechanical and optical engineering. The IAC80 under the sky and washed with the red light of the dome.
In all, the IAC80 provided the team with sufficient data of a black hole binary system called SWIFT J1910.2-0546, which was the primary target for the whole trip. It also produced some excellent images of various deep sky objects, including the pillars of creation in M16 The Eagle Nebula.

In part two I will write about the science in a bit more detail and post some images the team was able to acquire. I was also able to do some astrophotography of my own which I will include.

I owned a Newtonian for Three Days

I purchased a second hand 8" Ritchey Chrétien recently, but when delivery day came, I found that I had been sent one of those amazing, fast imaging Newtonian telescopes by mistake. It has since been sent back and I am now the proud owner of an RC8

However, the first thing I thought when I saw the Newtonian, was photo op! 


I wanted to post some pictures of the 8" Newtonian on my HEQ5 for one reason. When researching astronomy equipment, I quickly realised that there weren't very many images online of the kind of set-up I wanted. If someone is thinking of putting this telescope and this mount together, then perhaps these images might help them in making a decision  During the short time that I had the telescope, I noted that it could be very well balanced on the HEQ5. Though being quite a heavy telescope, the mount could more than handle the it. It also has the usual great build quality from GSO.

Apart from this being a little informative, what amateur astronomer doesn't love looking at others equipment photos online?

Thanks to Tom and Neil from Astronomia/Telescope Outlet for taking care of me.

30 September 2012

Lunar 9 - RC8 First Lunar Light

Here's a sneaky first light of my new 8" Ritchey Chrétien telescope. 
Torrent of posts to follow, I promise.


OTA: 8" Ritchey Chrétien
Camera: Nikon D3100 14.2mp
Mount: HEQ5
Exposures: 125
Exposure: 1/350sec
ISO: 100

3 September 2012

Lunar 9 - Foreground Detail

When imaging the moon, and especially at high magnifications, you really notice how fast the moon is travelling across the sky. When tracking the moon on a mount with the suitable tracking rate it's fine, but what about if you want to capture a shot of the moon rise with some terrestrial detail silhouetted against it?

That's when you only have a matter of minutes to take your shots, because that moon will be clear of the horizon so quickly. This is where that pesky culprit, moon glow, actually plays a helpful role. Before the moon actually starts to peak over the trees you will see the pale glow on the horizon first, giving you a little extra time to set up your scope.

I was learning all this on the fly, and was a little late adjusting my camera settings so all I was able to come away with was the following image. 


Next time I'll know to be ready, but these types of lunar photos offer huge scope for the imagination. Pardon the pun.

29 August 2012

Irish Supernova Discovery

Just announced by the International Astronomical Union, on Monday 22nd of August a new supernova was discovered by Irishman David Grennan in the galaxy IC2166. The star in question was a hundred times the mass of our own sun, exploding 123 light years away


Image Credit: David Grennan

The supernova has since been named 2012EJ.

I can't imagine how awesome it feels to discover a supernova, not to mention a second. Congratulations to David! Now, where's my supernova discovery?

26 August 2012

DSO 3 - M31 and NGC 884

We were blessed with a nice clear sky last night in Cork so I just had to go out and play.
Here are stacked/processed photos of Andromeda galaxy and the double cluster NGC 884 with
some photoshop voodoo applied.


OTA: WO 72mm Megrez w/ Moonlite Focuser & SkyWatcher FF & LPR Filter
Camera: Nikon D3100 14.2mp
Mount: HEQ5 Pro
Exposures: 10
Exposure: 45sec
ISO: 400


OTA: WO 72mm Megrez w/ Moonlite Focuser & SkyWatcher FF & LPR Filter
Camera: Nikon D3100 14.2mp
Mount: HEQ5 Pro
Exposures: 1
Exposure: 1min
ISO: 3200

These were all unguided using the HEQ5 Pro. Just some accurate polar alignment.

The SkyWatcher FF (which I got from Stephen at KTEC) made a huge difference while imaging with the 72mm Megrez, as you can see from this shot without the FF:

17 August 2012

If I had Science Funding

As I'm sure most amateur astronomers do, I spend a silly amount of time drooling over images and spec sheets of various unaffordable equipment online.

In the spirit of this procrastinational activity, I've compiled a small wish list in the hope that these items may fall off the back of a truck some day, and land in a neat pile in front of me.


Reference:
http://www.astro-physics.com
http://www.skywatcher.com
http://www.sbig.com
http://www.planewave.com

5 August 2012

Tutorial: DIY Bahtinov Mask

I've only been an amateur astronomer for the best of a year and as I predicted, quickly began doing astrophotography. The one thing I've learned, is that focusing your imaging telescope is one of, if not the most important part of the process.

Whether imaging with a reflector, cadadioptric, beginner achromatic refractor or a €3000 apochromatic refractor, your images will suffer if the focus is not perfect. My own results have been hit and miss so far, as I've been focusing by eye, and trial and error.

To make the process easier and more accurate, I studied up on Bahtinov masks. Invented by Pavel Bahtinov, the Bahtinov mask is a focusing aid for use with all telescope types. These can be purchased custom made for your particular telescope, but depending on aperture size, it's just another expense that can be avoided by making one yourself.

So I did!

Things you'll need:

  • Sharp knife (Stanley or artists knife)
  • Transparent tape
  • Electrical tape (Or any strong tape)
  • Your printed Bahtinov pattern
  • Plastic binder cover (Or other strong plastic material)
  • A lid or circular object (Preferably 1-2cm larger than the overall scope diameter)


1. Get your Bahtinov mask pattern.
There is a very useful Bahtinov mask pattern generator over at astrojargon. It's pretty self explanatory and most applications will only need a few of the parameters adjusted. The important things are focal length, aperture, and edge thickness. Subtract the aperture from the overall diameter of the scope to get the edge thickness. If the mask is for a reflector or cassagrain type telescope, you can add a value for the central obstruction diameter. Make sure you check the box next to "Scale to 72 DPI" to insure it prints to scale.
Press generate and print your Bahtinov mask pattern to scale.

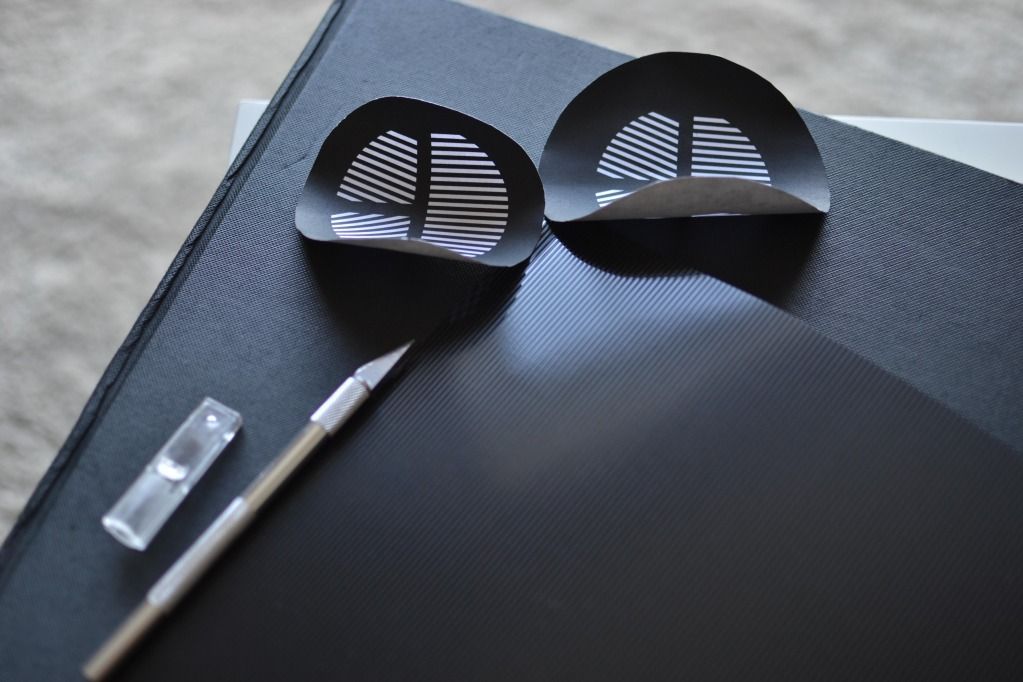
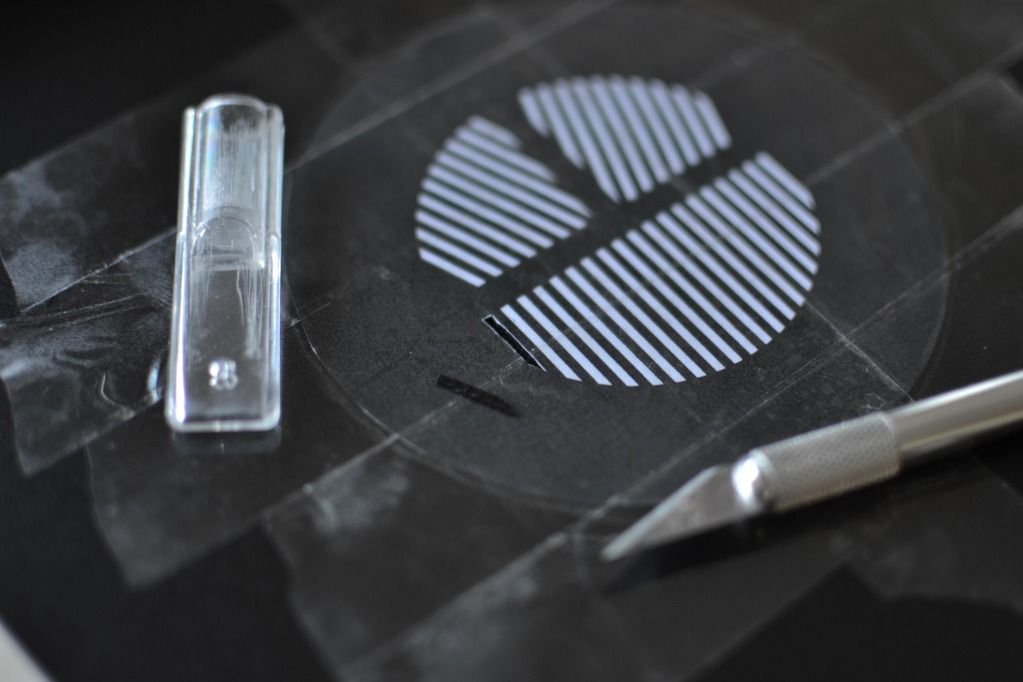
2. Cut out your Bahtinov pattern with your knife.

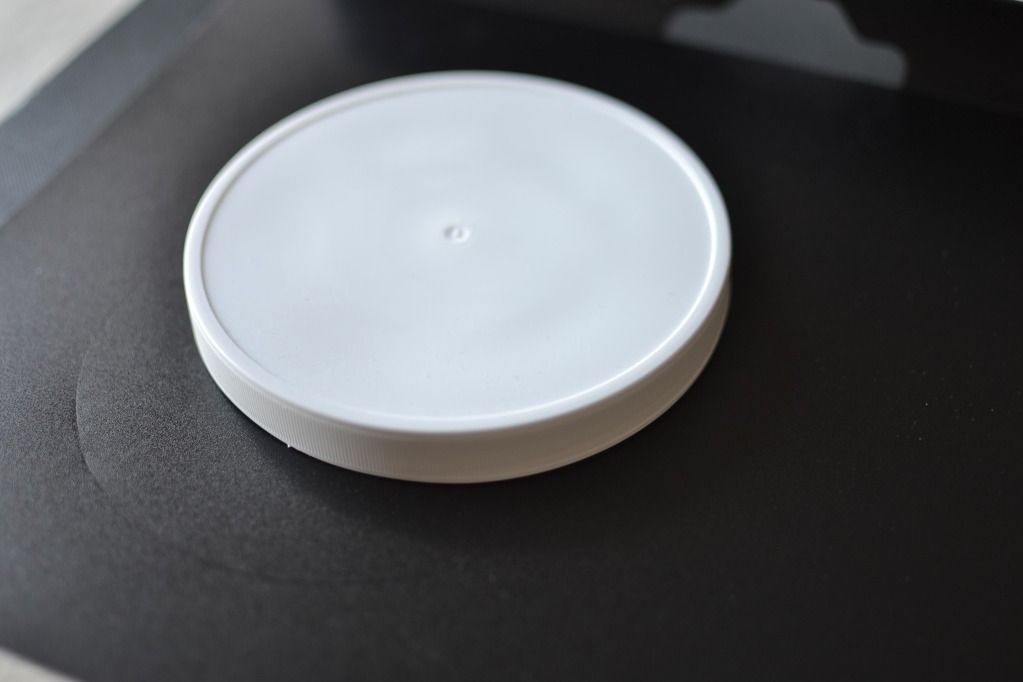
3. Trace a circle onto your plastic binder cover. 
I used the lid of a tub which was about 1.5cm larger than my scopes diameter.


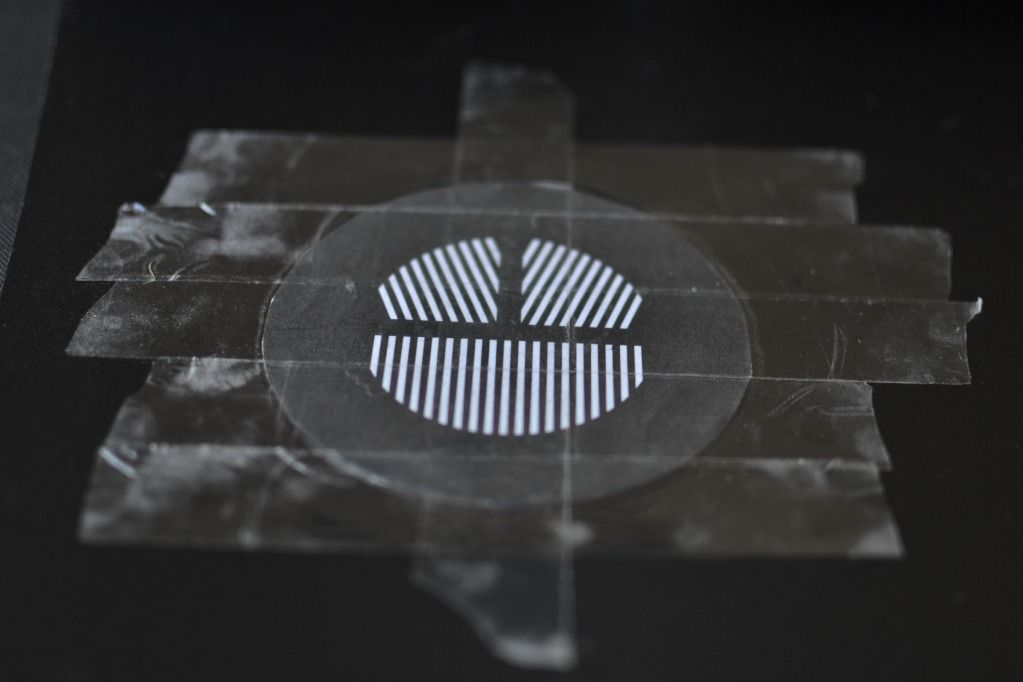
4. Center your Bahtinov pattern cut out in the circle you traced on your plastic binder cover. Secure it with the transparent tape.


5. Using your knife, cut out the slits from the Bahtinov pattern. Make sure you cut all the way through the plastic binder cover.


6. When all the slits have been cut out, you can remove the tape and the printed Bahtinov mask pattern. 


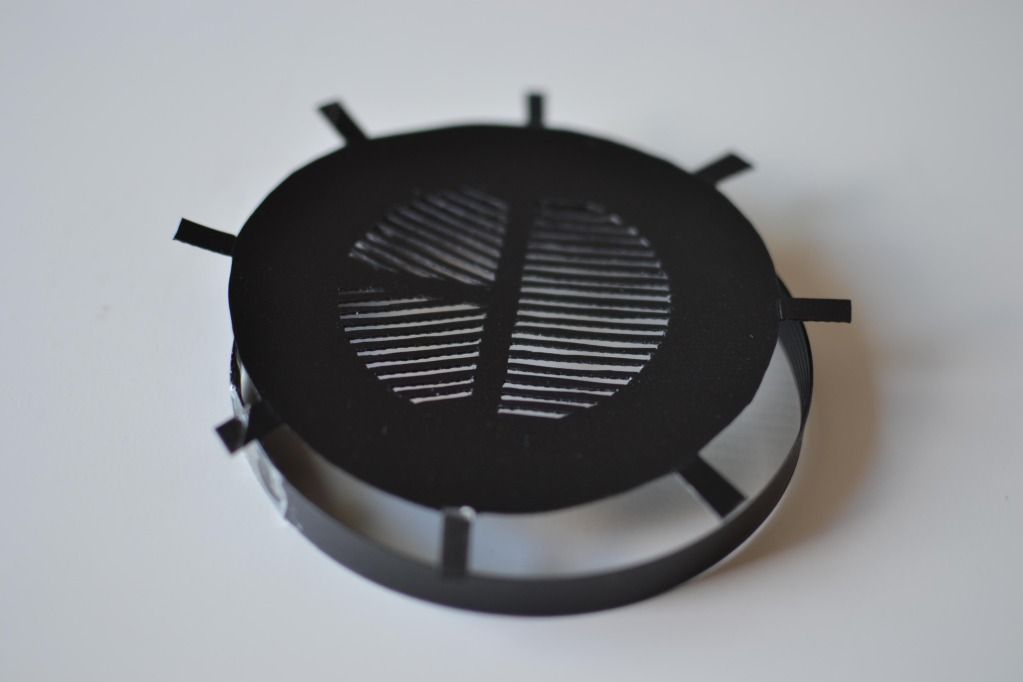
7. Using the space between the larger outer circle you traced, and the edge of the Bahtinov mask print, draw and cut out some support spokes. You can now cut the whole mask from the plastic binder cover. Cut out a length of plastic and connect both ends to form a band, the diameter of the scope.


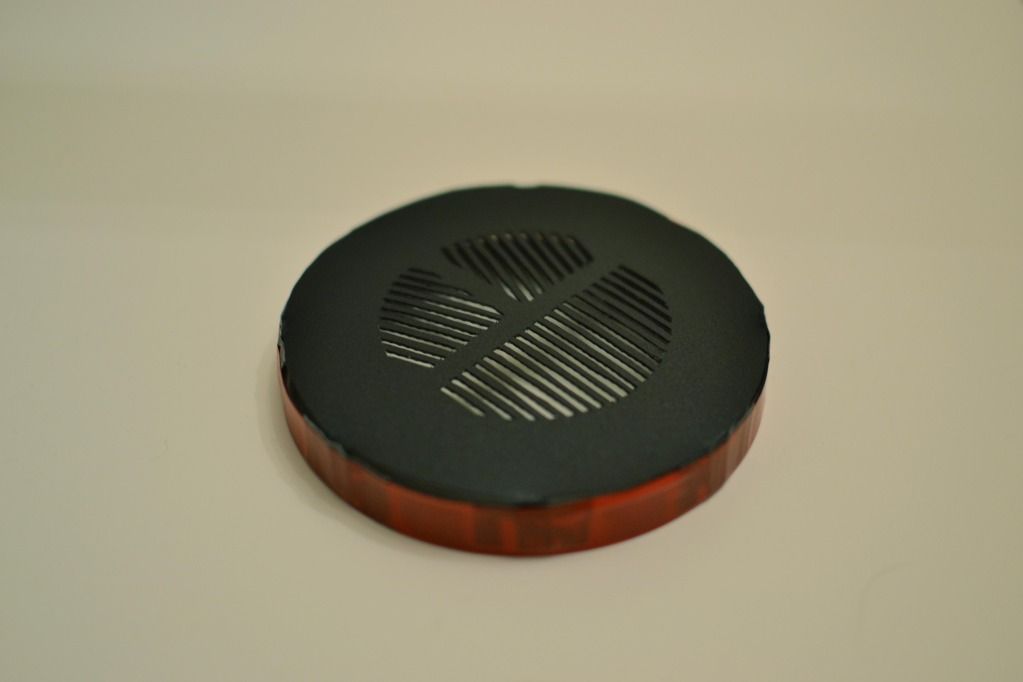
8. Fold the spokes down over the band of plastic and tape it down with the electrical tape. I chose red tape because I thought it looked pretty awesome.


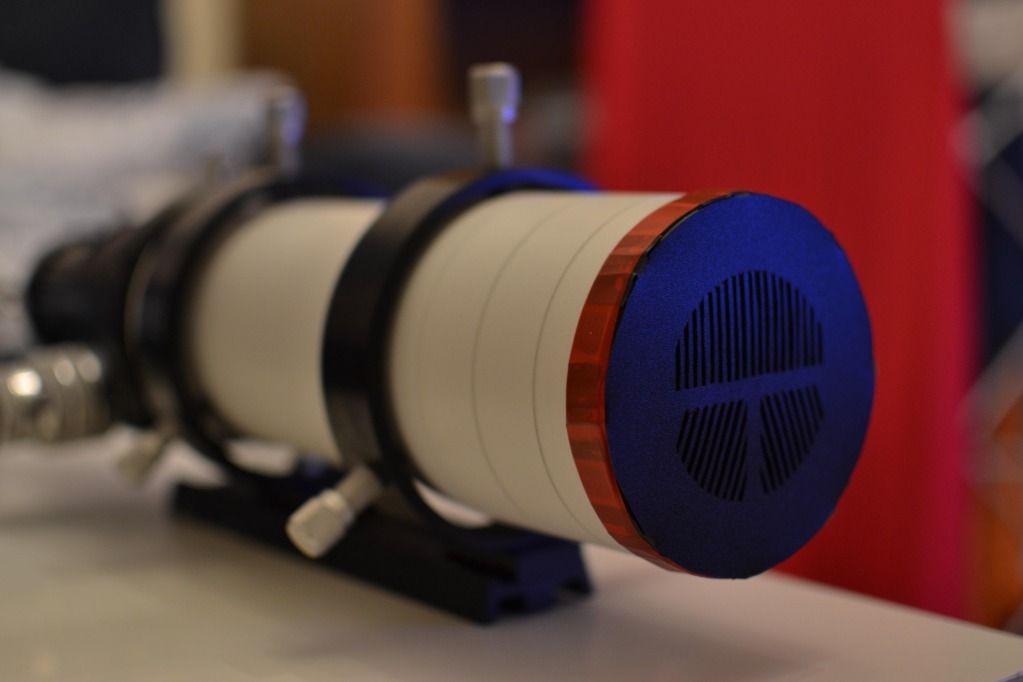
You now have a fully functional Bahtinov mask to focus your telescope with. Here is a photograph of mine, attached to my William Optics Megrez 72.


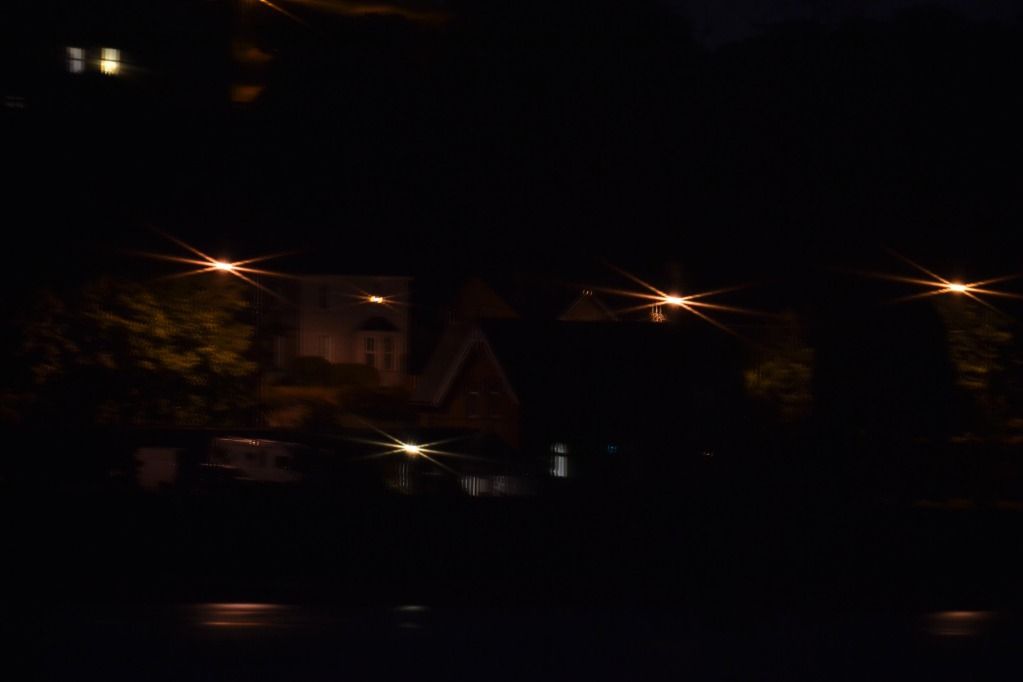
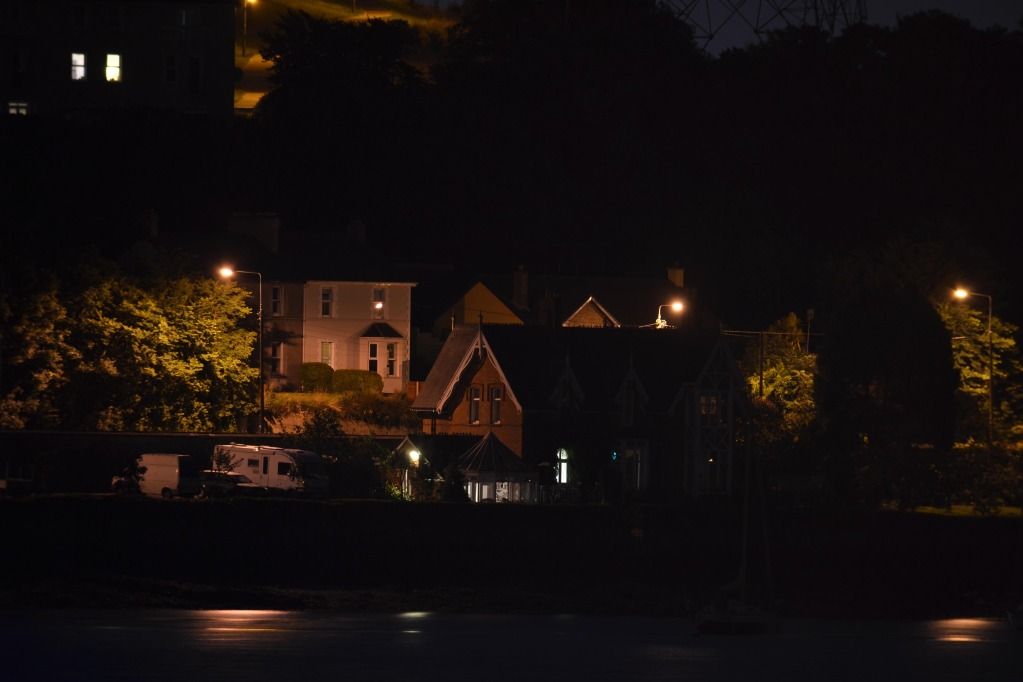
So it looks great, but how does it perform when actually focusing the scope? The sky was cloudy, so I didn't have any stars to test it on. However, some distant street lamps will work just fine for our testing purposes. Below is a photograph of the aligned diffraction spikes, indicating good focus, and a photograph of the scene I used with the mask.


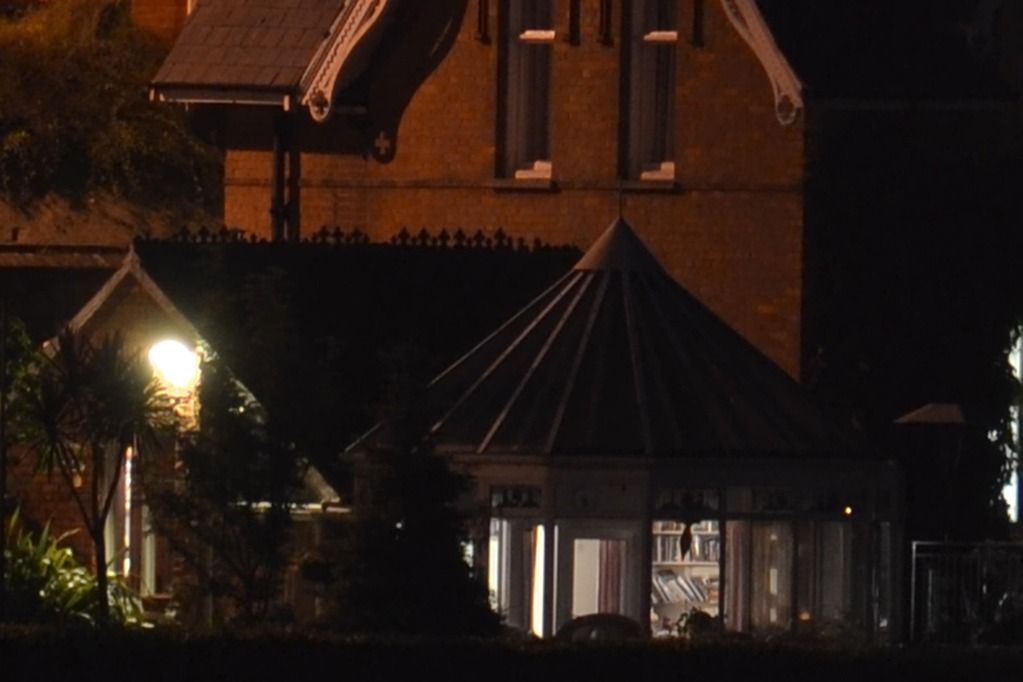
And an enlargement of that shot:


As you can see, the Bahtinov mask has helped me successfully focus my telescope very accurately. I hope you enjoy following my tutorial as much as I enjoyed putting it together. 

Clear skies and happy imaging!

31 July 2012

Proud Member of WETI


While listening to a great episode of my beloved Astronomy Cast, Fraser and Pamela were discussing the search for extraterrestrial life. During this episode they mentioned the WETI Institute, a completely legitimate organisation which is dedicated to their mission of waiting for extraterrestrial intelligence. This is a cause I simply had to give my assistance. Considering my resources and availible time I can pledge to WETI, I am proud to announce that I am now a full time 24/7 member of the Effortless Action Committee and strive to do my very best to wait as hard as I can.

I now call on you, to join the wait and become a member too.

WETI needs you!


WETI of course an offshoot of the SETI Institute, who's mission is the search for extraterrestrial intelligence. SETI also need your help, and perhaps, even more than WETI.

SETI@home is a project which allows you to use any idle CPU time you may have on your computer to mine through huge amounts of astronomical radio data in the hope that you might be the one to uncover a pattern or signal hidden in it that will indicate the whereabouts of intelligent life elsewhere in our universe.

This is a noble cause, and I was quick to sign up and donate some of my idle computer time. I may have a been a little generous however and my computers power supply exploded.

Next time I'll be more careful, and there will be a next time.

30 July 2012

To Infinity and Beyond!

I came across this article about NASA designs for a new space suit for its astronauts. I just had to post an article of my own because I love it!


I know I can't be the first to make this comparison and I really really hope that this isn't a joke.


I know nothing about suit design but I'm sure the Buzz Lightyear green must be a temporary material. If there are some Pixar fans working at NASA, and there most likely are, then this is a fantastic way to grab the attention of weird children who are somehow not excited by space and astronomy already.

24 July 2012

A New Addition

As soon as I caught the astronomy bug I new right away that I would eventually be drawn to the art of astrophotography, and so I did.

Like, most amateurs and professionals would tell you, you should begin your hobby by getting your hands on a cheap and cheerful planisphere and a pair of decent binoculars. As sensible and good this advise is, I was stubborn and wanted to skip ahead to imaging. Although I don't regret the course I took I may have missed out a little bit on the simpler pleasures of astronomy.

I still haven't bought a planisphere, but for good reason. There are some fantastic apps out there for android and iOS, and since I already had the phone how could I say no to a free download? That's for another post though.

As for binoculars, I've finally got a pair in the form of some Bresser 20x60 Saturns.


They are second hand and did require some collimation. A lot of people will say they collimating binoculars should be left up to proffessional optics dealers/repair shops but it actually was quite simple and, in my case didn't even require the use of a bench. I found this great write up on Cloudy Nights forum which explained the proccess very well.

I'm now looking forward to some 'zero setup time' observing and something to occupy myself when my imaging scope is doing it's thing.

21 July 2012

DSO 2 - My First M31 Andromeda Galaxy Image

Last night we finally saw an end to the seemingly perminent grey weather and were blessed some some clear skies. I've been itching to give my Megrez 72 it's first imaging run and chose M31 as my target, as it was positioned very conveniently in the sky. Here are the results


OTA: WO 72mm Megrez w/ Moonlite Focuser
Camera: Nikon D3100 14.2mp
Mount: HEQ5 Pro
Exposures: 1
Exposure: 1min
ISO: 3200

My next goal is a guided image of M31 using an OAG and Orion Starshoot Autoguider.


I foresee that acquiring a guide star will prove difficult, as I learned last night while trying to use PHD. However, I'm sure with a little patience and luck I'll succeed.